I finally got some new fabric to make a dress! Yay me! I’m beyond excited, after having sewn several commissions, I’m ready to make something for me again.
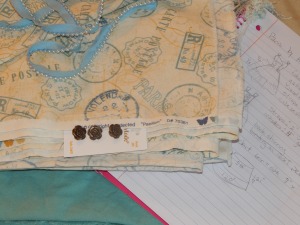
I’m going to call it “Paris by the Sea”. Yeah, I’m freak’n excited to sew.
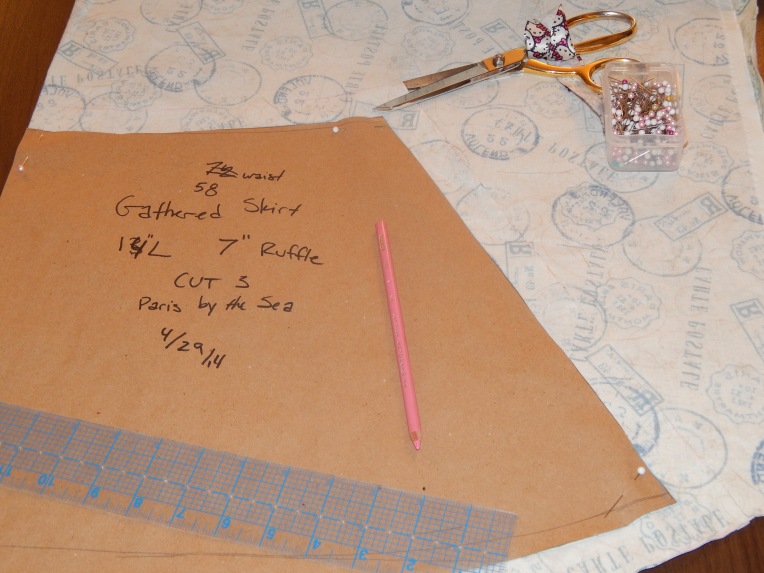
While I was getting all of my pattern notes (on the right of the picture above) and patterned out my skirt, I thought “this might be helpful for fellow handmade Lolitas”. While I do have a video tutorial and a high-waisted skirt tutorial, a basic Skirt Gores tutorial seemed like it was long overdue.
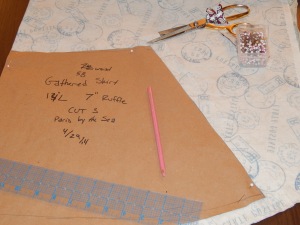
The basic Lolita skirt is easy. A rectangle that is 3 times your waist, gathered into a waistband or with elastic, hemmed to length. That is your basic, typical Lolita skirt pattern. It will give you a skirt similar to this:
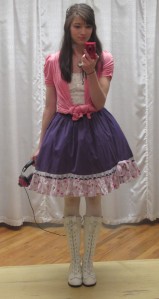
How, if you want something a little bit fancier and more tailored, like these skirts:
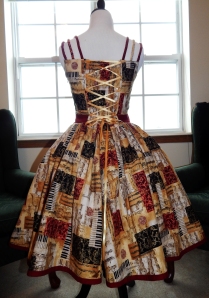
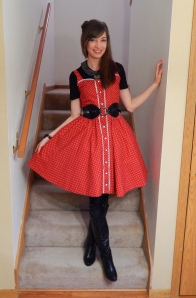

Then you need to pattern Skirt Gores, rather than simply a rectangle. Skirt gores allow for you to have different amounts of fabric at your waist and hem and is great for A-line, flared or even super full hems.
First, you need to decide what you want the dimensions of your skirt to be. Since you don’t have to follow the standard “3 times the waist” rule, you can do almost anything. Keep in mind that if you want gathering or pleating, you will need AT LEAST 2 times the waist. And always ALWAYS ALWAYS have at least 3 times your waist in the hem, or even more if your petticoat is extra fluffy.
Also, you need to know how wide your fabric is. This will determine how many gores you need.
I’m going with 2 times my waist for the waist of my skirt. I was planning on just gathering it, but pleating is so pretty! So I want to have either plenty to get some dense, even gathering or plenty to do some fun pleating.
The hem of my skirt is a weird number, yes, but that was because of weird math and my fabric width. It is approximately 4 times my waist.
The length I’m going for is 21″ which is right around my knees, but I might go a little shorter in the end. It is always better to go too long than too short, that way you can adjust things.
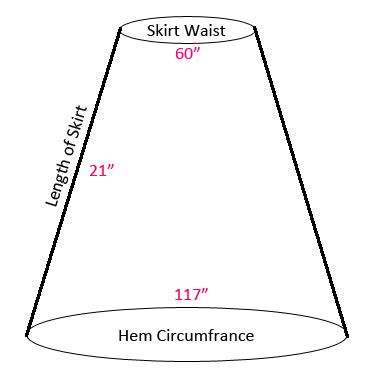
Now that you have your final skirt measurements determined, you can figure out how many goes you need. This number is determined by the difference between your waist and your hem. The bigger the difference, the more gores you need so that your seams are on complete bias, which will stretch your fabric and make your hem ever changing and uneven.
My lucky number is 3 gores, though sometimes I go with 5. I like an odd number that way there is NO SEAM in the center front, but I can have a pleasantly placed seam for a zipper, either in the center back or on the side. Also, if your fabric is only 45″ wide, like most fabric, you will want to make sure your gore is at least 2″ or 3″ smaller.
Once you decide how many gores you want, it’s time to pattern! Which is certainly the easiest part.
Get a big piece of paper (as I have previously mentioned, Brown Packaging Paper works great for patterning and is SUPER cheap. I get mine for $1 a roll at the Dollar Store).
Now, it’s time to do some math and jot down some numbers in the corner.
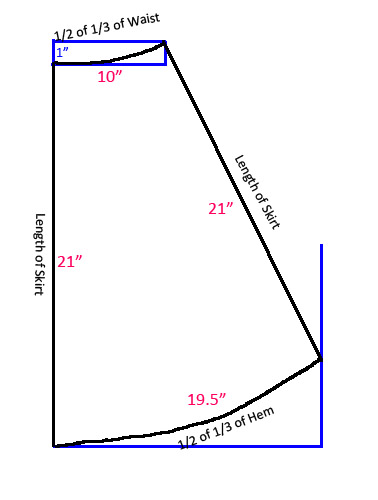
First, take your TOTAL waist measurement and divide it by the number of gores you want. Divide that number by 2.
Next, take your TOTAL hem measurement and do the same. (Divide by # of gores, then divide by 2).
Using a ruler, draw a line downward that is the length of your skirt.
(BLUE LINES)
Square off at the bottom to the right the width of your gore hem (total hem divided by # of gores, divide by 2).
Square UP from that line as a guide for later.
At the top, square off to the right the width of your gore waist (total waist divided by # of gores, divide by 2).
Square up 1″, then draw a rectangle back to the first line.
Now, using a curved ruler, draw a smooth line from the bottom left corner of the ‘waist rectangle’ to the top right corner. You will want to smooth the top right end of the curve to end at a right angle, parallel to the right edge of the rectangle.
From that point, draw a straight line that is the length of your skirt, to the Guide line at the bottom right of your pattern. Then, draw a curved line from the bottom of the left straight line to that line.
Ta-Da! Pattern! Make sure to make a few notes for yourself.
1) THIS PATTERN DOES NOT INCLUDE SEAM ALLOWANCES!!!!! If you aren’t used to working with patterns that do not include seam allowance, be sure to make a reminder ON THE PATTERN, to add seam allowance when you cut it out.
2) The LEFT SIDE should be on the fold, not the right.
3) Write down how many you need to cut out.
4) Always, date the pattern and even write what garment you made with it for reference later.
If you have any questions at all, please ask! I try to be as clear as possible, but I know these things can be confusing XP

Sorry i wanted to ask, are you dividing the gores by third then half because the curving of the hem/waist will equate to the full waist measurement?
thankyou
A 1/3 because I will cut 3 gores total, and then in 1/2 because I will cut all of them on the fold of the fabric 😉 You could not divide them by half if you weren’t going to cut them on the fold, it just takes up more paper. You curve the top (which curves the bottom) to accommodate the curving of the body. I hope that helps!
This is lovely! I’ve been struggling to figure out how to get an A-line skirt without doing a plain circle skirt, and this will work beautifully. ♡
I’m curious though: I’d love to make some border print skirts, but I can’t figure out how that’s possible with an A-line skirt, since the bottom of the gore is curved. Have you ever tried doing a skirt in this style with border print?
Hi Rebekah! I realize this is 3 years later haha life took over! However, you cannot do an A-line skirt with a border print UNLESS the fabric is custom printed to allow this.
How much meter cloth you use for long skirt?
I usually get at least 4 yards/meters if I don’t know exactly what I am going to do.